How to Photograph Jewelry and Other Products For Your Website

Every entrepreneur who successfully sells jewelry online knows how to take quality product photos for their website.
Websites are a tool for visual communication, so the way you display your products is fundamental to increasing your online sales.
You’ve probably heard the statistic that 93% of consumers consider visual appearance to be the key deciding factor in a purchasing decision. When every sale matters, poorly shot product photos can be a death knell for small businesses.
Lucky for us jewelry designers, it’s never been easier to take your own high-quality product photos at home. Anybody with a decent phone camera, good lighting, and a little bit of know-how can put together a beautiful shopping gallery for a jewelry website.
The 3 Types of Jewelry Photography

Source: Rosa Kilgore
Today we’re just going to be talking about taking product shots for your jewelry website. But it’s still important for you to understand the other types of jewelry photography as you’re building your online brand.
Each one serves a different purpose, and it’s important to have all three present on your website to establish a strong brand identity.
There are generally 3 types of photography you need for a jewelry website…
- Product Shots: This photography style is a way to clearly and cleanly display your products in your product gallery and product listing pages. The jewelry is the center of attention on a pure white or neutral background.
- Model Shots: In a model shot, your jewelry is still the center of attention, but instead of sitting in an empty background, it’s being worn by a model. Showing your jewelry being worn will help your customers visualize what it might look like when they are wearing it themselves.
- Lifestyle Shots: Lifestyle shots can encompass a wide variety of imagery, but they have one thing in common: They depict real or aspirational life. Lifestyle shots can include people and places, or they can just be objects displayed in a “flat lay” style. These images can be a very compelling part of your brand and story. They often emulate (or are inspired by) the lifestyle of your dream client.
We’re talking about product shots today because those are the photos that appear first in your website product listings and ultimately convince the viewer to buy.
You can, and should, include model and lifestyle shots in your product listings, too. But product shots capture the intricate details of your jewelry and give your website a crisp, uniform appearance.
If you want to dive deeper into the other types of jewelry photography, I go into much more detail in our Websites That Sell Bundle.
Make Your Product Photos Look Professional
Source: Jennifer Dawes Design
As a jewelry business coach I’ve done a lot of website reviews for jewelry designers, and I can tell you this: no matter how beautiful your jewelry is, unprofessional product photos will be an instant turnoff for potential customers.
Avoid these common ecommerce photography pitfalls when taking pictures of your jewelry…
- The photo is low resolution and it’s difficult to make out the product details.
- The photo is blurry and/or out of focus.
- Your jewelry is poorly or unevenly lit and the photo looks dark.
- Your jewelry is in front of a busy, cluttered background.
- Your jewelry is askew, twisted, or off-center.
It might seem like common sense, but if you’re new to photography it’s important to be mindful of these rookie mistakes. Nothing’s worse than seeing beautiful jewelry ruined by lazy photography.
Invest in Good Lighting
Source: Waffles & Honey
Lighting can make or break a product shot.
Filtered natural light is the best kind of light for photography. If you’re not planning on buying a light box, try to photograph your jewelry in a room with lots of windows on a cloudy day.
However, I highly recommend investing in a light box, especially if you want to take product shots with a pure white background. Look for the type that has built in LED lights, like this one. For a $20 investment, you’ll save yourself hours of headaches.
Photographing jewelry presents a unique lighting challenge because it’s often very reflective.
If you’re getting a lot of glare, reflections, and hotspots in your product photos, that’s a sign you need to filter your light source. White, translucent objects make the best filters, such a bedsheet, tissue paper or wax paper.
Brush Up on Photography Basics
Source: Twyla Dill
You don’t need to be a professional photographer to capture stunning photos of your jewelry for your website.
That being said, a little bit of know-how can go a long way in elevating your product photos from meh to WOW.
If your photos aren’t up to par, set aside some time to study up on the basics of photography – and set aside even more time to practice, practice, practice.
Don’t feel like you need to upgrade to an expensive camera unless you actually know how to use it, though. With the quality of smartphones nowadays, chances are good that your phone camera is powerful enough to take excellent photos.
But if you do want to get fancy and learn to use a manual camera, Pixelz has a great technical guide to DIY product photography to get you started.
Keep Your Product Shots Consistent With A White or Neutral Background
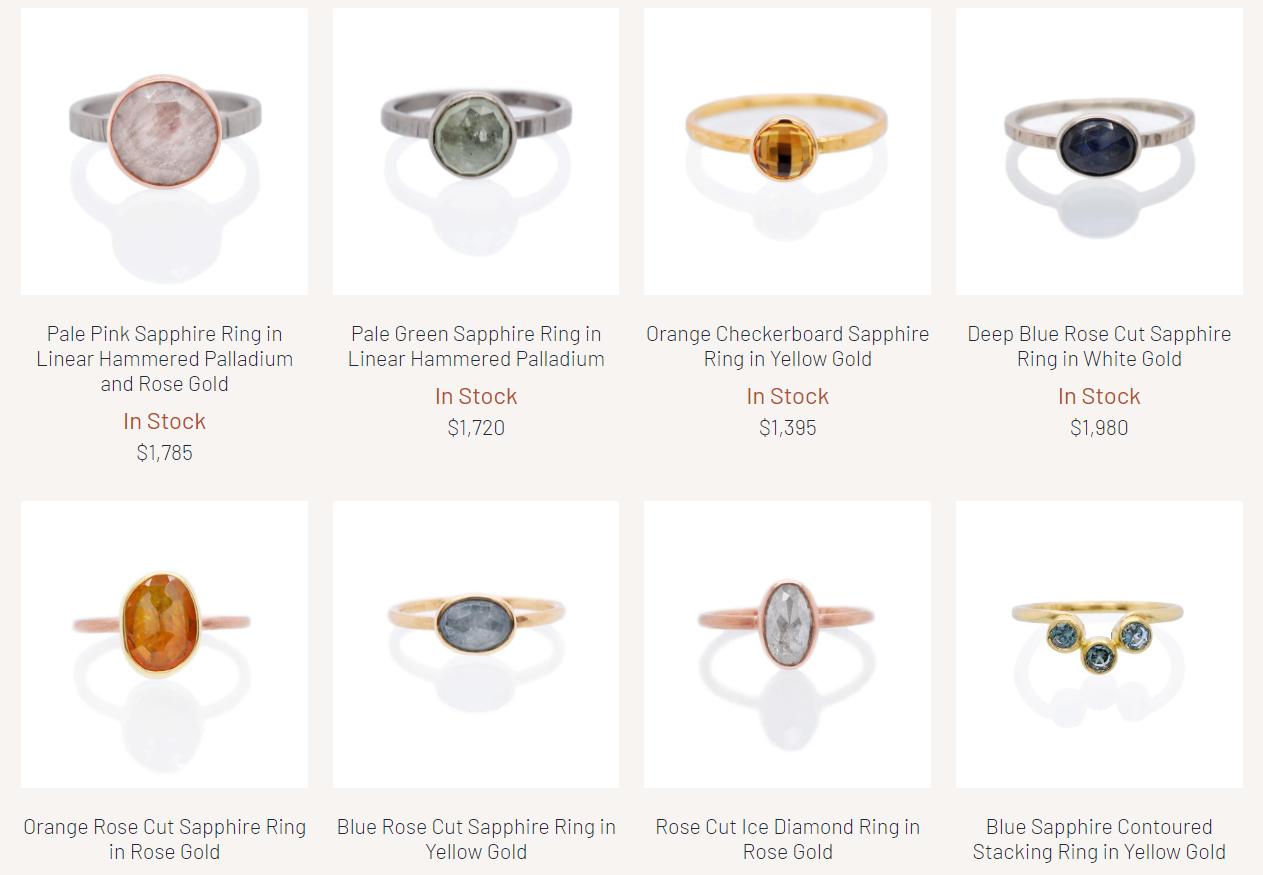
Source: EC Design Studios
This is usually the first thing jewelry designers get wrong with product photography.
When a customer looks at your product page, they’ll be seeing all your photos side-by-side. Displaying your jewelry on a colorful background with lots of props might look cute on its own, but if all your product shots are like this, your shopping page is going to get cluttered and confusing.
It’s so important to make sure all your product photo backgrounds are simple and consistent. This will keep your shopping page professional and easy to navigate.
Photograph your jewelry on clean, white backgrounds. If you insist on doing any color other than white, at the very least make sure you use the same one every time.
You can elevate your product shots even further by making a DIY sweep, eliminating any distracting edges from the background of your photo.
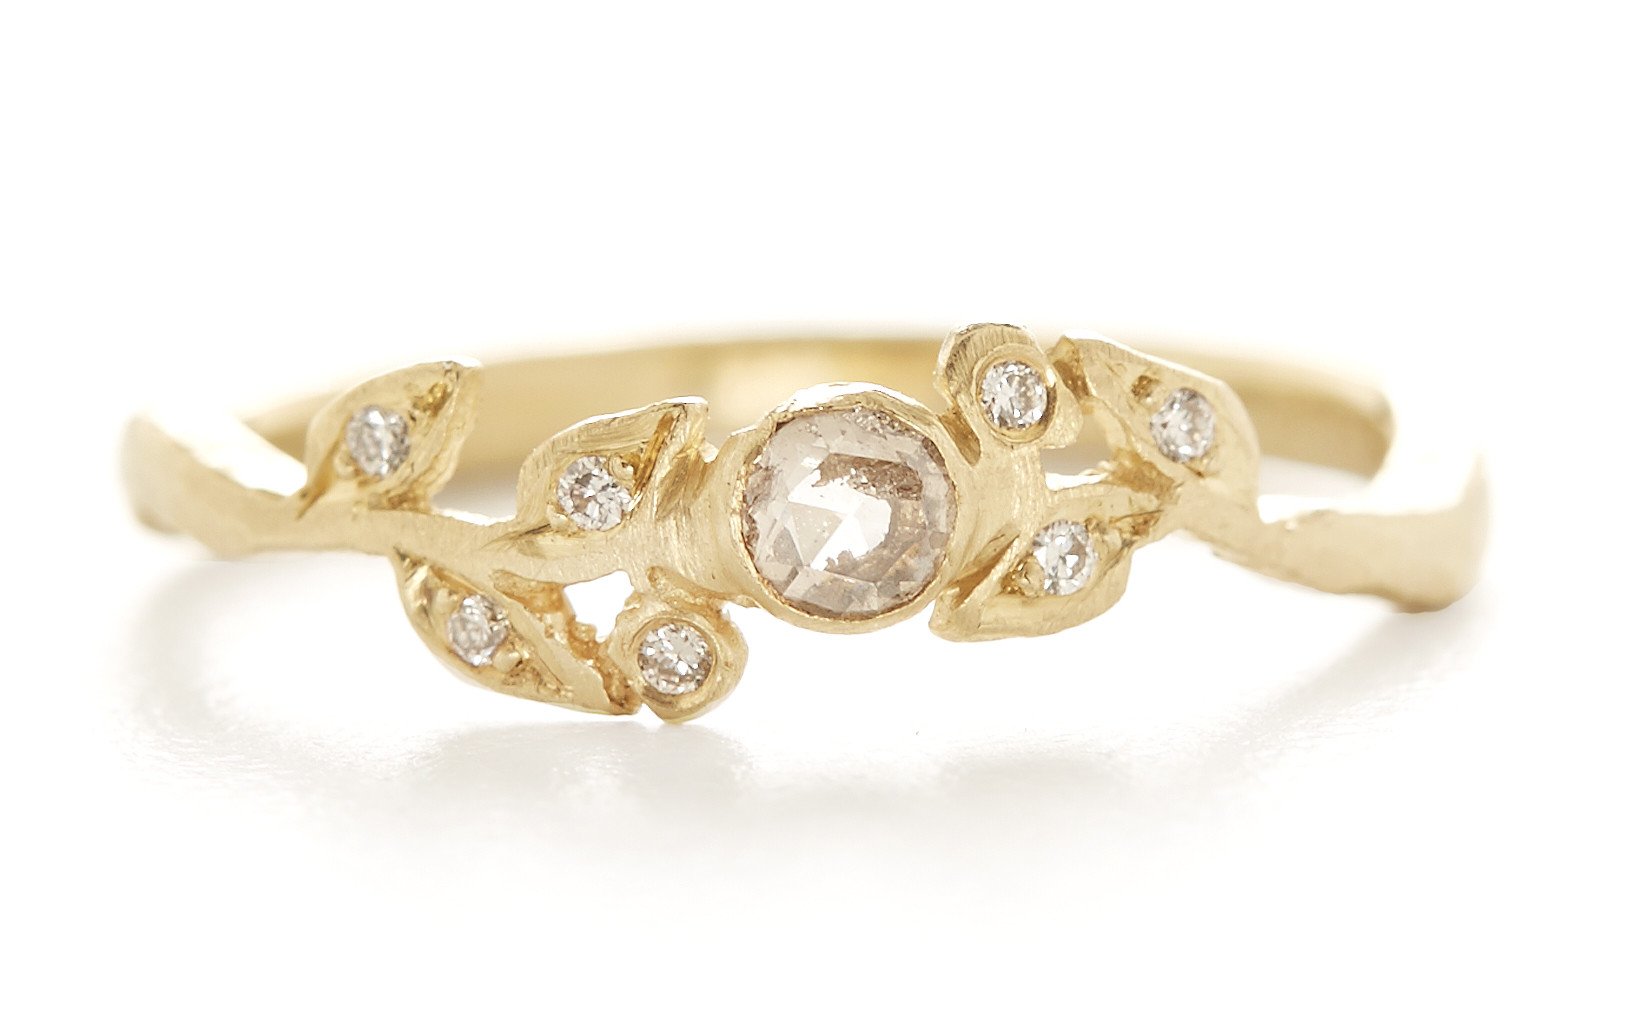
Capture All the Details of Your Jewelry
Source: Gardens of The Sun
While it’s vital that your first product photo for each piece of jewelry is consistent and simple, you can mix it up when you take the rest of the photos for your product listing.
You need more than one photo of your product. By capturing as many details as possible, you can help the viewer overcome any reservations they have and convince them to take the leap and buy it.
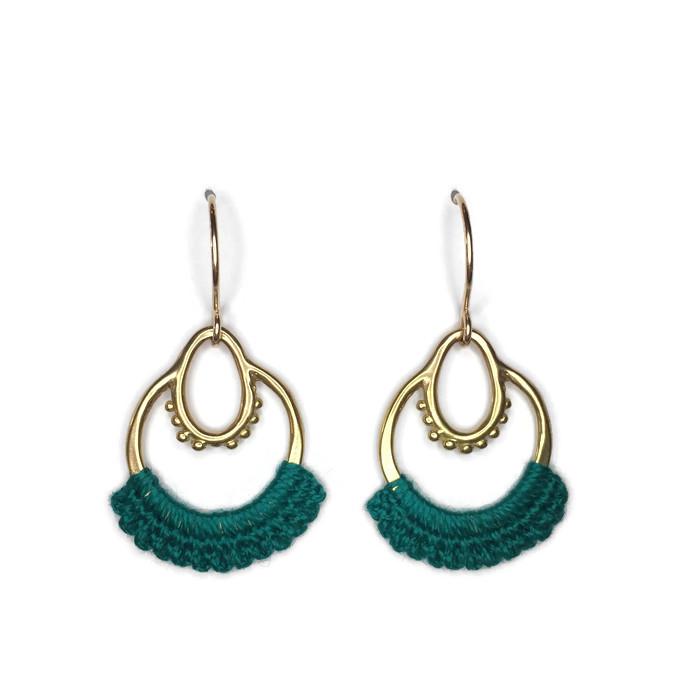
Take photos of your jewelry from numerous angles and positions…
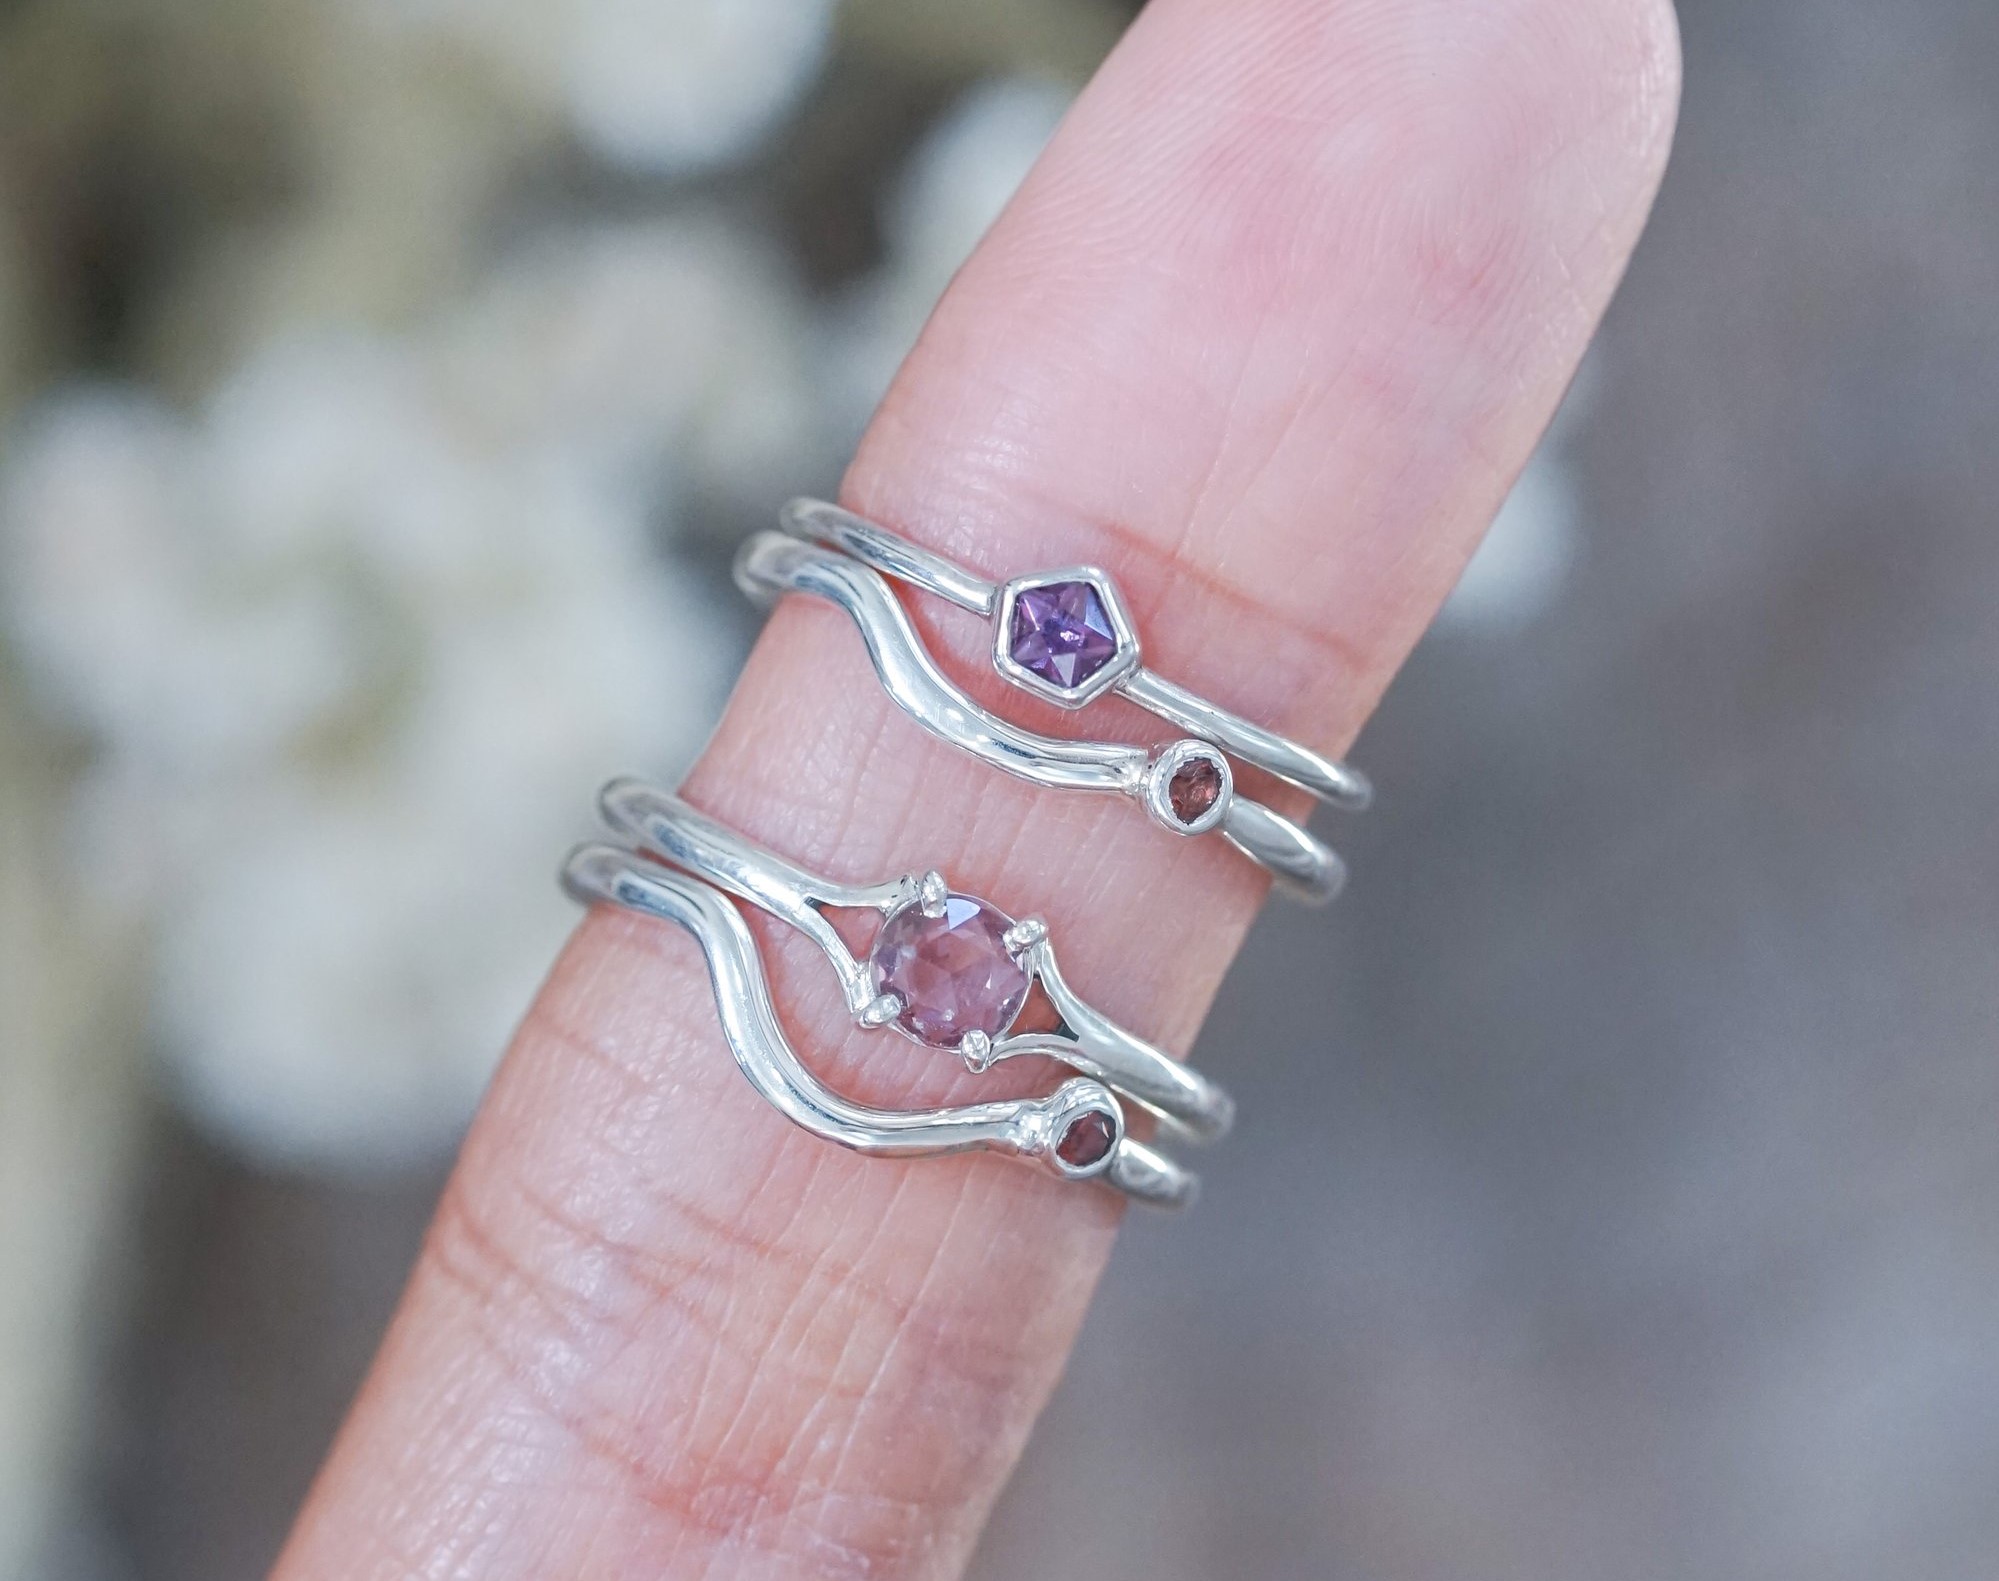
- For earrings, photograph them laying flat as well as hanging from a display or a fishing line.
- For an item that customers typically purchase in multiples (such as bangle bracelets or stacking rings,) photograph them individually as well as in multiples.
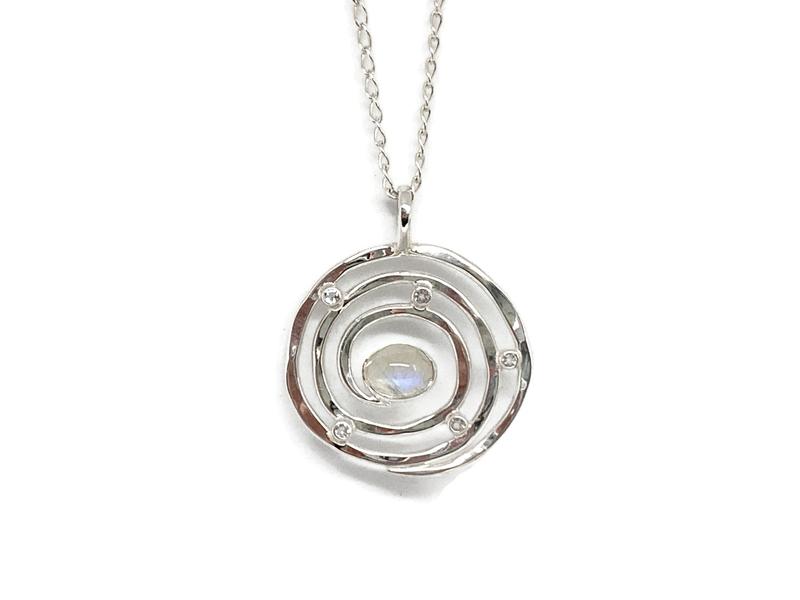
- For necklaces or link bracelets, take close-up photos of the chain and clasp.
- For an item with details on both the front and back side, photograph both sides.
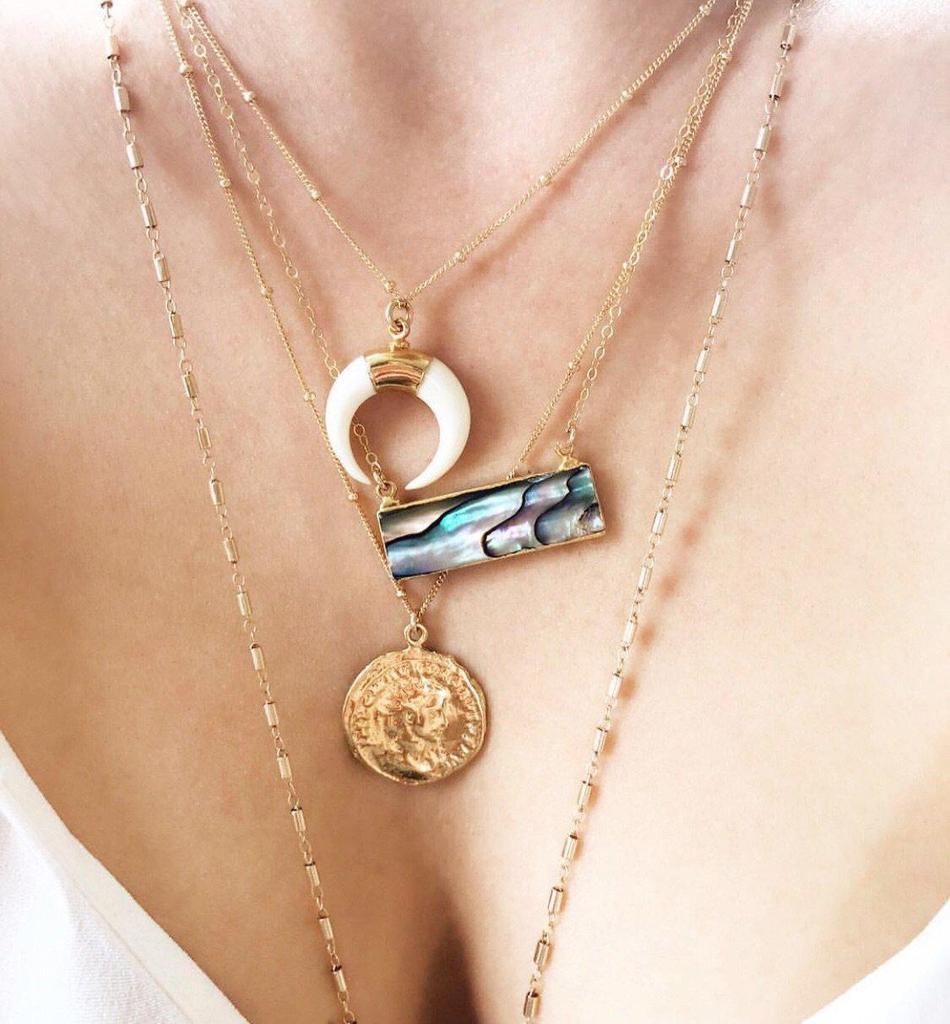
You should also include model shots to demonstrate what your jewelry looks like being worn, but make sure to lead with basic product shots first.
Photograph Your Packaging Too
Source: Love, Clementine
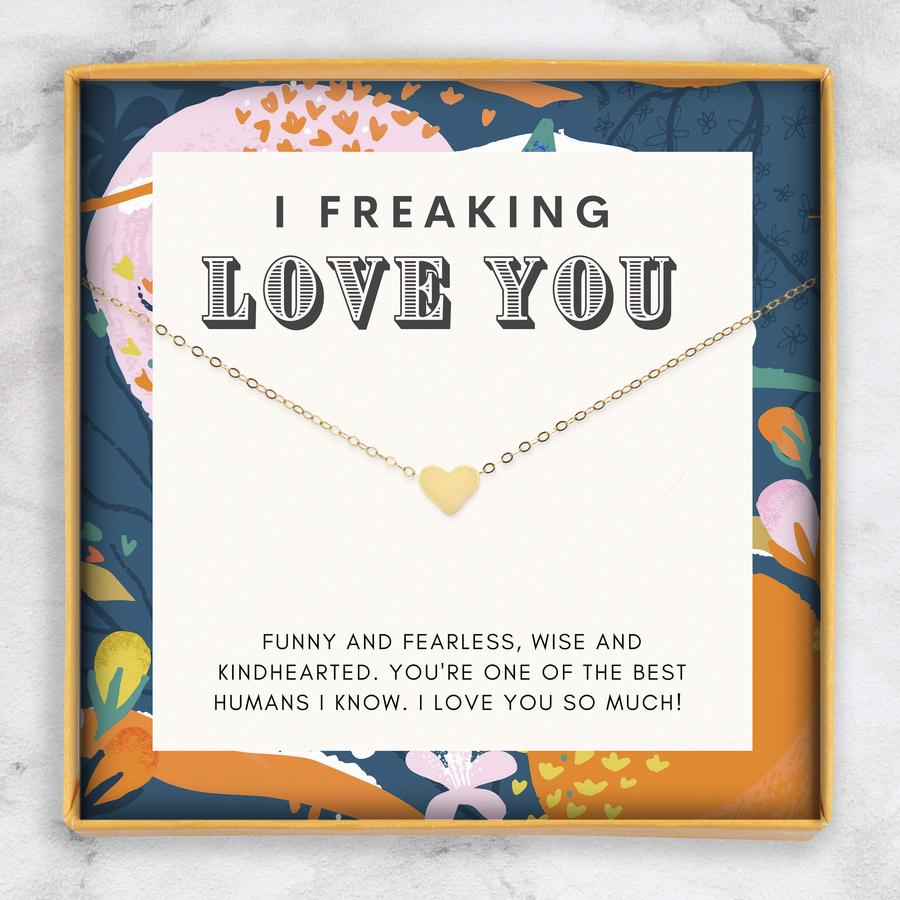
While you’re taking pictures of your jewelry, consider taking photos of your packaging as well.
Include everything the customer will get in the mail when they order from you. For example, if your packaging also includes a gift message or card, include it in the photo.
Unboxing a new piece of jewelry is a fun experience the customer can look forward to. Taking pictures of your packaging helps them get excited about ordering from you.
Besides, cute branded packaging is something to be proud of. Show it off a little bit!
Do Edit Your Product Photos, But Don’t Be Misleading
Source: FantaSea Jewelry
Editing your photos is fundamental to making them look professional.
There is plenty of user-friendly and free software out there you can use to edit photos of your jewelry…
- Use apps like Adobe Lightroom or Snapseed to color correct and crop your photos.
Editing should be used to better represent the true appearance of your jewelry – be extremely careful not to be misleading with your photo editing.
Take the time to capture the “true” color of your metals and stones. It can be very hard to do this without a lot of practice, so give yourself time to learn how to get it right!
You never want to accidentally misrepresent any aspect of the jewelry you’re selling. The last thing you want is for a customer to feel disappointed or deceived when they receive their order.
Don’t Be Afraid to Ask for Help
Photos are everything. If your photos aren’t beautiful or don’t accurately depict your product, it’s time to retake them.
If you're having trouble getting photos that you love, outsource to a professional. Photos are too important to be anything less than fabulous.
Or invest in your own independent learning with our Websites That Sell Bundle.
Written by jewelry designers for jewelry designers, it includes everything you need to know about product photography, SEO, web design, email marketing, and more that will help you boost your online conversions and turn your website into a jewelry-selling machine.
So what are you waiting for, m’dear? Get out there and make a killer website!